
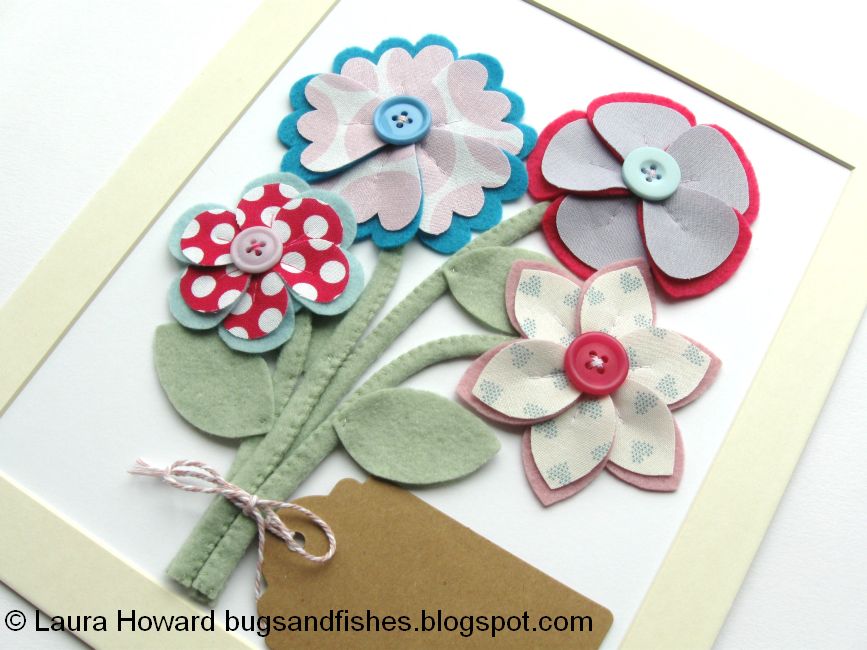
Today I'm sharing a "how to" for making a frame-able posy of felt and fabric flowers.

The 3D flowers are designed to be mounted in a box frame, with a tag attached on which you can write a phrase or message of your choice. This project originally appeared in docrafts Creativity magazine a couple of years ago, and was made using felt, fabric, buttons and other supplies from the docrafts range.
I used a mix of felt and fabric to create my flowers, but you could use two shades of felt instead if you'd prefer. You can use any colours you like for making the flowers: select your shades and mix and match them throughout the posy. Placing contrasting colours together (e.g. blue fabric on pink felt) will help make the details of each flower pop!
You will need:
- the templates provided at the bottom of this post
- a selection of pretty fabrics (quilting cotton is ideal)
- co-ordinating felt
- co-ordinating buttons
- matching sewing threads
- green felt
- green sewing thread
- iron-on interfacing
- an iron and ironing board
- a gift tag
- some bakers twine
- a box frame*
- sewing scissors
- sewing needle and pins
- a pen (to write your message on the tag)
- sticky tape
- double sided tape
- craft scissors
- sturdy white card
*I used a frame sized to fit an 8 x 10 inch (20 x 25 cm) photo. If you’re using a different size frame you can resize the templates or make a different number of flowers to create a larger or smaller posy.
To make the picture:
1. Iron your chosen fabric to remove any creases. Cut a piece of iron-on interfacing that's large enough so you'll have room to cut out the five or six fabric pieces for one flower - don't cut out the petal shapes yet! Apply the interfacing to the back of one of your chosen fabrics, following the manufacturer’s instructions.
Repeat this step for each of the flowers.
Tip: applying the interfacing will help prevent the fabric edges from fraying. If you're using felt instead of fabric, skip this step.
2. Use the templates provided to cut out the pieces for each flower in the quantities shown. Each flower is made up of one felt flower back and a set of felt and fabric petals.
3. Follow the flower instructions (below) to make all four flowers, arranging them in a bunch to fit the frame.
4. Write your message on the tag. Then cut a length of twine, knot it onto the tag and tie it in a bow around the flower stems. Trim any excess twine.
5. Open up the frame and remove the card mount. Turn the mount over and line up a piece of white card to fit the mount (I used a piece of A4 card). Stick the card in place on the back of the mount with tape, then turn the mount over.
6. Arrange your posy on the backing card. Then, starting from the centre and working outwards, secure the posy and tag with pieces of double-sided tape.
To make each flower:
1. Place the fabric petals on top of the felt petals.
2. One by one, sew the petals to the backing circle so the petals slightly overlap. Use running stitch and thread to match the fabric, sewing two thirds of the way up each fabric petal. Sew up the petal and then back down, filling in the gaps to create a continuous line of stitching.
3. Add a contrasting button to the centre of the flower, sewing it securely in place with a double thickness of the same thread.
4. Cut a narrow piece of pale green felt for the flower stalk – this should be approximately 1.5 cm wide and as long as you need for each flower’s stalk. If required, use the template provided to cut a leaf from matching green felt.
5. Fold the long felt piece and pinch the fold between your fingers, sewing the edges together with whip stitch and matching thread. Your finished stalk will be slightly curved. If you want to add a leaf, sew it to the stalk with a couple of small stitches, hiding the knot at the back.
6. Sew the top of the stalk to the back of your flower, using whip stitch and sewing into the back of the flower but not through it.
Tip: to make sure your posy will fit your frame, arrange the pieces as you go along using the frame’s mount as a guide.
Click here to view the template sheet, make sure you're viewing it full size then print it at 100%.

Enjoyed this free tutorial? Buy me a "coffee" and help support my blog!

Subscribe to my newsletter for a monthly free pattern and visit my crafty tutorial archive for lots more free projects.
Visit my shop to buy my printable PDF sewing patterns:
3 comments:
Your flowers are so pretty - thank you for sharing.
Great idea for a card or even gift package! Thank you for the templates - sometimes I think "I can draw this" but I know I can't :)
Thanks guys!
bairozan - yes, these flowers would look great attached to cards :)
Post a Comment